Grilled Onigiri With Soy Mirin Sauce
- Share via
When I was growing up in Tokyo in the ‘60s, we had bento day at school once a week. This meant Mother had to get up early and fix lunch for her five children. We were proud of her bento, which might include a little leftover meat, such as sukiyaki, yakitori or tonkatsu, as well as a vegetable dish, such as kinpira (stir-fried carrots and burdock), and fresh fruit -- often a tangerine or apple. But onigiri was the centerpiece of the bento. I would show it off to my friends at lunchtime, and, of course, my friends reciprocated with their mothers’ creations. If anybody brought a store-bought sandwich instead, you felt a little sorry for that person and pretended not to look. Or you offered one of your onigiri.
Onigiri is a quick and satisfying Japanese fast food made with rice. You might find some resemblance to those sushi rolls you have been snacking on, but fundamentally they are two different things. Sushi’s focal point is the fish, which sits on top of rice seasoned with a sweet vinegar and salt mixture. The vinegared rice acts basically to preserve the raw fish.
Onigiri, on the other hand, is more about eating rice. The filling is the added bonus, to give the otherwise plain rice some flavor and punch. Onigiri tastes especially divine when it is made by hand, with fresh, hot rice. It can also be served in place of a bowl of rice or bread. It is the most versatile Japanese finger food I know.
Onigiri comes in various shapes. My mother’s was triangular. So was my grandmother’s. And thus mine too, though when I was young I flirted briefly with round shapes because they were easier to mold. At school, I remember one that looked like a shot put, which was made by the single father of a boy in my class. That boy always brought three dried sardines to go with his big onigiri.
To make good onigiri takes some practice. The shape and quality are determined by the amount of pressure you apply with your hands. You want the interior to be light and fluffy. But the exterior should be firm enough that the grains stick together but remain unsquashed. It should have the touch of a firm pillow.
Handmade onigiri takes a little practice. In the meantime, there are plastic and wooden onigiri molds that you can buy -- basic shapes like triangles and balls but also molds shaped like Hello Kitty, Mickey Mouse, tulips, stars, hearts and even cars. I own flower and tubular molds myself, which come in handy when I have a party and don’t have enough helping hands.
Use short- or medium-grain rice to make onigiri because it is sticky. Long-grain rice isn’t, so I don’t recommend it for this purpose. Brown short-grain rice and sweet rice work well too.
Onigiri should fall apart in your mouth, not in your hands. Use a wrap to help hold the rice together. The most commonly used is toasted nori seaweed. It comes plain or seasoned -- I prefer the natural flavor. Make sure the nori is crisp and shiny. If it feels stale, toast it by running the sheet over the flame of your burner, waving the sheet back and forth. But be careful not to burn the sheets or your fingers.
There are many ways to wrap onigiri. You can be generous and use half of a nori sheet like a blanket to wrap the entire rice ball -- that’s what I do. Or you can cut the seaweed into 1 1/2- to 2-inch-wide strips and wrap the sides of the triangular onigiri, using two to three strips. For a tubular or round onigiri, use one strip. If the edges of the seaweed stick out of the rice ball, just press them into the rice or leave them as is.
You can also serve onigiri plain or sprinkled with roasted sesame seeds. Or you can grill it, which is one of my favorite barbecue offerings.
When it comes to onigiri fillings, I am traditional -- umeboshi (pickled plum), seasoned bonito flakes and grilled salmon are my favorites.
But sometimes I get inspired by the onigiri that are sold at convenience stores. Priced less than $2, these machine-made onigiri are downright cheap, and new flavors keep popping up. A piece of ham or sausage inside a rice ball wrapped with a belt of nori can draw the attention of any hungry student. On my Metrolink ride from Pasadena to Lancaster recently, I was able to buy a salmon onigiri at Union Station. The attendant even offered to heat it for me. With a bottle of green tea in one hand and warm onigiri in the other, I almost felt as if I were in Japan.
Spam musubi is a very popular onigiri in Hawaii that falls into that meaty group. There are also onigiri stuffed with pork and kimchi stir-fry, or seasoned ground chicken, which contains chili and sesame oils to add spice and umami.
Then come the seafood varieties. One major group of this kind of onigiri is flavored with mayonnaise -- tuna mayo, shrimp tempura mayo, salmon mayo. It’s a mystery to me why Japanese love mayonnaise so much. I never acquired a taste for it.
Some kinds of onigiri contain chopped almonds or use a blend of six soy sauces to season their gourmet fillings.
It’s really mind-boggling to see the evolution of onigiri, but the basic concept remains intact -- it is still all about the rice. I don’t know any other food that enjoys such a dual quality -- both as mother’s comfort food and the darling of the convenience stores.
If you are going to make onigiri at home, I suggest you start with something simple -- such as a plain onigiri seasoned just with salt and wrapped in a piece of nori. You can use a mold if you like.
For your second onigiri, you can try making it by hand. Eventually, you will become an expert if you keep practicing. You might even invent a filling that suits you. It can be as easy as taking some scrambled eggs and chopped bacon, mixing them into your onigiri, then wrapping it up with nori.
Wouldn’t that make a nice new-wave breakfast? I would go for it.
Soy mirin sauce
In a small bowl, whisk together the soy sauce and mirin.
Grilled onigiri assembly
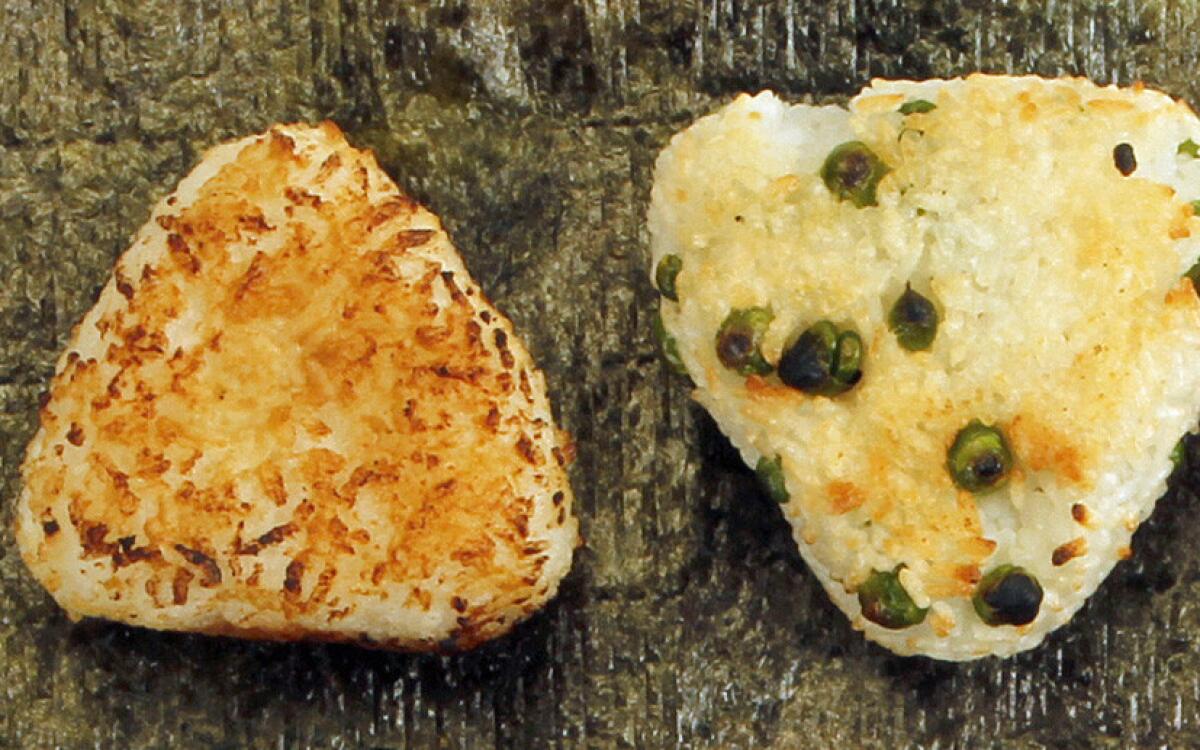
Brush the onigiri with a little oil to prevent it from sticking to the grill. If you use a spicy oil like chili oil, it will give the onigiri heat.
Heat a grill pan or grill over medium-high heat until hot, or heat the broiler. Line the grill pan, grill or a baking sheet (if using the broiler) with foil. Grill the onigiri on both sides until crisp and slightly toasted; this can take from 5 to 10 minutes on each side depending on the heat and cooking method. While grilling, baste the onigiri with a little of the sauce on each side a few times until it is absorbed and becomes crisp; the onigiri should not be moist from basting when done. Watch carefully, as the onigiri can burn.
Serve immediately while the onigiri are piping hot.
Get our Cooking newsletter.
Your roundup of inspiring recipes and kitchen tricks.
You may occasionally receive promotional content from the Los Angeles Times.


