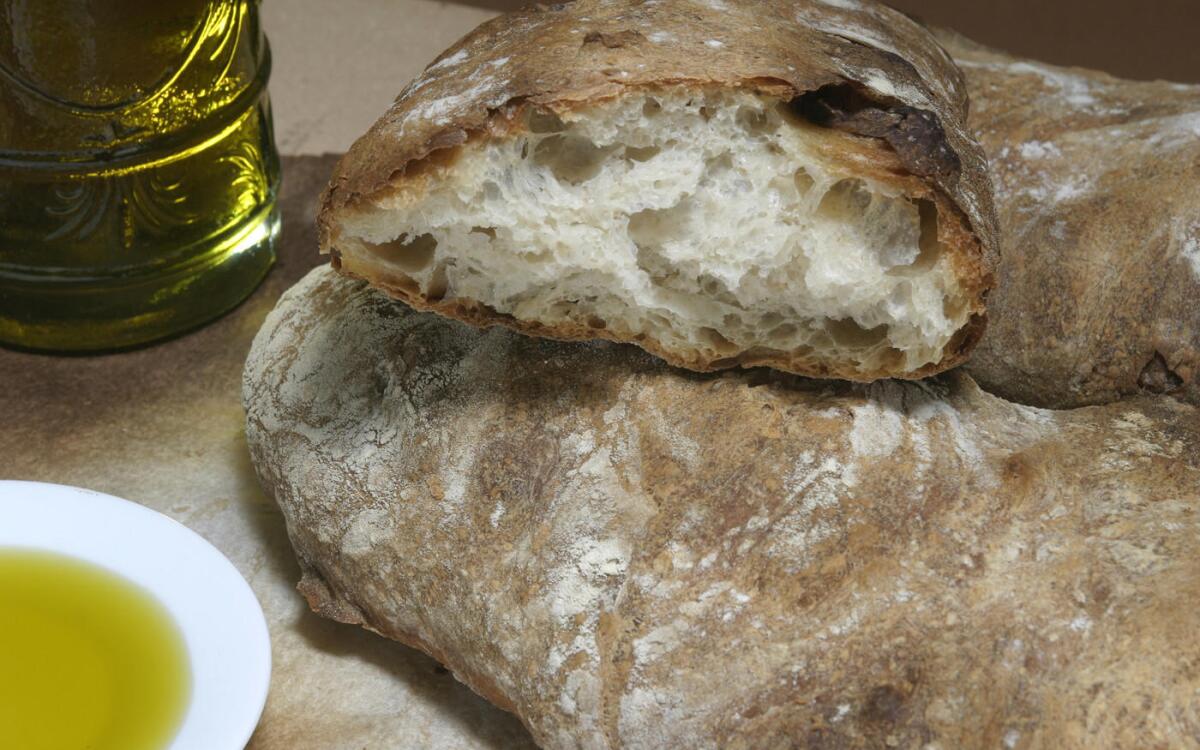
Ciabatta
UP at the crack of dawn, the campers were bused to a nondescript building in an industrial district. Inside, men and women in uniform were calling out orders.
âAction, action! Letâs go!â
A military encampment?
No, it was Camp Bread 2005, a celebration of artisan bread sponsored by the Bread Bakers Guild of America that brought together bakers from the U.S. and Canada last week for three days of demonstrations, lectures and, best of all, hands-on classes taught by some of the superstars of bread.
And if the teachers, dressed in crisp, white bakerâs jackets, got a bit insistent at times, you didnât hear any complaining. This total-immersion weekend was heaven for the bread-obsessed. Within a week of the announcement of the event, all 200 attendee slots were filled and a waiting list started.
Most of the students were professionals (only about 20% were home bakers), including such experts as Sumi Chang of Euro Pane in Pasadena. Many were from Northern California and the Pacific Northwest -- the mother lode of artisan bread in this country.
Camp Bread was actually less like a camp and more like an extremely lively academic conference, with labs, except that you could eat the results.
It was serious bread. Artisan bread-making processes are based on those used in Europe for centuries to make hearth breads. They often begin with a starter (sourdough or one made with commercial yeast) thatâs allowed to develop for at least 12 hours.
The main dough is mixed for a relatively short time, just four or five minutes in some cases. Then the risings of the main dough -- professionals call the first rising the fermentation stage, and the second the proofing -- can take as many as three or four hours.
The general rule: small amounts of leavening and large amounts of time to develop flavor.
The scene was intense, with simultaneous workshops -- taught by the rock stars of bread -- unfolding throughout the San Francisco Baking Instituteâs training center building. In a supply room, popular author Peter Reinhart demonstrated his baguette methods before rapt attendees, while in the vast kitchens, King Arthur Flour bakery director Jeffrey Hamelman taught techniques for rye breads, and legendary teacher Didier Rosada took a group step-by-step through the mysteries of sourdough.
âSomeone is doing it all wrong,â Rosada said, looking directly at me as I tried to shape dough into a round boule loaf. âBut no names, no names,â he continued with a laugh as he rushed over to show me how to save the woefully misshapen mass by gently cupping my hands around the dough and moving them in a circular motion as I dragged the mass across the tabletop. The combination of the hand motions and friction brought the dough together in a taunt ball. Well, at least on the third or fourth time I tried it. Rosada, the French-born head of production at Uptown Bakers in Maryland, is known for his vast knowledge of the field.
His sourdough class began with a half-day lecture on techniques and science. The next day, he started the daylong kitchen session earlier than scheduled to demonstrate how to tell, by feel, when a dough is adequately mixed. It should be still quite sticky, he preached -- the water content of his breads are much higher than in the usual homemade loaves. Then, during the first fermentation, the dough was periodically poured out onto a lightly floured board and folded like a letter from all four sides before being put back in the tub.
It was astonishing how time and the folds built up the strength of the dough, transforming it into a springy mass.
*
Watch closely
THE next day, William Leaman of Essential Baking Co. in Seattle took us through hand mixing, a short kneading process and the risings (with folds). Finally, each of us divided our developed dough into six equal pieces, giving us six chances to learn how to form a baguette. As we watched, Leaman folded one into a taunt cylinder and then put his hands, one over the other, at the center. He began rocking the dough back and forth, applying gentle pressure, and then gracefully drew his hands apart as he worked. It took him maybe 10 seconds to stretch the dough into a long baguette shape.
âI learned more about forming a baguette in a few minutes of that class than I have in years of trying to get it right,â said home baker Chuck Robinove of Monument, Colo.
Not all the learning came during classes. During meal breaks, the famed bakers talked shop and tried each otherâs breads. Cutting open a baguette that came out of a Reinhart session, Maggie Glezer, author of âArtisan Baking Across America,â peered at the inner structure with the intensity of a scientist examining a rare specimen.
Throughout the cream-colored interior were large, irregular holes that had formed during the doughâs final expansion in the oven. This was a good sign that the bread was light and chewy, as is fitting for a baguette. The edges of the holes were slightly shiny, denoting a high water content contributing to a silken texture.
And it was all wrapped in a dark brown crust spotted with tiny char marks.
âThe structure is just this little obsession we bakers have,â Glezer said.
Then she broke off a piece to taste and passed it around. The chewiness of this baguetteâs interior, mixed with the crunch and slight smokiness of its crust, provided a flavor so complex and satisfying that it was hard to believe it came only from flour, water, yeast and salt, the four basic (and in this case, sole) ingredients of artisan bread.
While traditional home-baked bread still has its place, it only takes a taste of bread of this caliber to know that a whole other level is possible.
Glezer put down the bread with satisfaction.
âWe talk on and on about the structure and the science, and all of that is important,â she said. âBut in the end, it all comes down to this, the taste. Thatâs what itâs about.â
Great bread by the book
âArtisan Baking Across America,â by Maggie Glezer (Artisan, 2000). This is a terrific guide for bakers just entering the world of artisan breadmaking. Glezerâs adaptations of bakery techniques for the home kitchen are reliable and her instructions are clear. The book sports beautiful photos by Ben Fink. Under the shortened title âArtisan Baking,â it comes out in paperback next month.
âThe Bread Bakerâs Apprentice,â by Peter Reinhart (Ten Speed Press, 2001). Reinhart is probably the most popular of all artisan bread teachers -- his classes nationwide regularly sell out. Serious bakers could quibble with the fact that this tome, his latest, lists no metric alongside the English weight measurements, but Reinhartâs writing style is undeniably inviting, especially for beginners.
âBread: A Bakerâs Book of Techniques and Recipes,â by Jeffrey Hamelman (Wiley, 2004). Geared toward the intermediate or advanced home artisan baker, this is a treasure trove of formulas and information from the director of the bakery center at King Arthur flour. Try the wonderful potato bread with roasted onions.
Biga (the morning of the day before baking)
Sprinkle the yeast into warm water, stir and let stand for 5 to 10 minutes.
Mix the bread flour, all-purpose flour, whole-wheat flour and rye flour in a bowl. Measure one-half teaspoon of the yeasted water into the flour mixture. (Throw the rest away; the point of this step is not to proof the yeast but to measure 1/384 teaspoon yeast.)
Add the three-fourths cup water, using ice water in the summer and warm water in the winter. Thoroughly mix the biga; it will be stiff, but it has a very long fermentation and will soften considerably. Knead in a tablespoon or two of water if you absolutely must.
Cover tightly with plastic wrap and let the biga ferment for 24 hours in a cool spot in the summer or a warm one in the winter. Donât be alarmed if it does nothing for at least 10 hours; this is correct. The biga is ready when it doubles or triples in volume and smells aromatic.
Bread (baking day)
Combine the flour, yeast and salt in the bowl of an electric mixer.
Stir in the water and biga by hand to form a rough dough.
Using a paddle attachment, beat the dough on medium speed until it is fairly smooth, about 5 minutes. If the dough is very firm, add water. This should be a very soft dough. If your dough is not really gloppy, add extra water until the dough is soft enough to spread (your flour might be old or absorbing more water for a variety of reasons).
Scrape the dough into a bowl at least three times its size and cover it tightly with plastic wrap. Let it ferment until light and doubled in bulk, about 2 1/2 to 3 hours, turning the dough every 20 minutes for a total of four times. To turn the dough, sprinkle the top of the dough (while still in the bowl) and the work surface with flour; scrape the dough out of the bowl and onto the floured work surface. Sprinkle the dough with flour again, then gently spread the dough out, trying not to deflate the bubbles. Fold it up into a tight bundle by folding the left side into the center, followed by the top, the right side and the bottom. Turn the dough over so that the smooth side is up, and fold it in half again, only if it still feels loose. Place it, smooth side up, into the bowl and cover tightly.
After the fourth turn, at 80 minutes, leave the dough undisturbed for 1 1/2 to 2 hours or until well expanded and doubled.
Thoroughly flour a bakerâs couche or two tea towels. Flour the top of the dough and the work surface, then turn the dough out. With a dough scraper, cut the dough in half. Gently stretch the pieces out (approximately 12 by 8 inches) and fold them loosely into thirds, like a business letter, arranging the folds so the last seam is slightly off center. Try to handle the dough as little as possible to avoid deflating it.
Place the dough seam side down on the floured cloth and sprinkle more flour over the top. Cover the loaves with folds of the couche or more tea towels. Let them proof until they are very soft and well expanded and barely spring back when gently pressed, about 45 minutes.
Immediately after shaping the dough, arrange a rack on the ovenâs second-to-top shelf and place a baking stone on it. Clear away all racks above the one being used. Heat the oven to 450 degrees.
When the dough is ready to bake, place a sheet of parchment paper on a peel. Gently flip the loaves onto it so they are seam side up and stretch them very slightly to make them vaguely rectangular. Donât be afraid to handle the dough; the breads will recover in the oven as long as you are gentle.
Dimple the dough all over with your fingertips, pressing down to the paper without breaking through the dough. Slide the breads on the parchment paper onto the baking stone. Bake the breads until very dark brown all around, 45 to 50 minutes, rotating them halfway during baking. Let cool on a rack before slicing. Bread is best eaten the same day.
Get our Cooking newsletter.
Your roundup of inspiring recipes and kitchen tricks.
You may occasionally receive promotional content from the Los Angeles Times.


