How to can your jam (if you want)

- Share via
This story is a component of the feature “Seasons of Preserves: Stone Fruit,” which is part of a four-part series on preserving fruit at home called “L.A. in a Jar.”
This guide is all about giving you the tools to make small batches of jam for you and your family that can stay in the fridge and that you can enjoy together. However, like me, you may want to gift your jams to friends and family elsewhere. And for that, you’ll need to can them properly so they’re shelf-stable.
Dozens of preserving books (all wonderful resources), USDA warnings, and generations of cultural panic over home-canned, -preserved or -fermented food have left most people thinking that canning fruit preserves is akin to outfitting a home with electrical wiring — too complex to comprehend and a sure sentence for death if you don’t know what you’re doing. The “B-word” — botulism — is a worry that doesn’t apply here because you will have cooked your jam at a high enough heat to kill the responsible bacteria and you’ll be using so much acid, in the form of lemon juice, in this recipe that they can’t survive. If you want reassurance beyond what I provide below, read and follow the USDA’s “Preparing and Canning Jams and Jellies” guidelines.
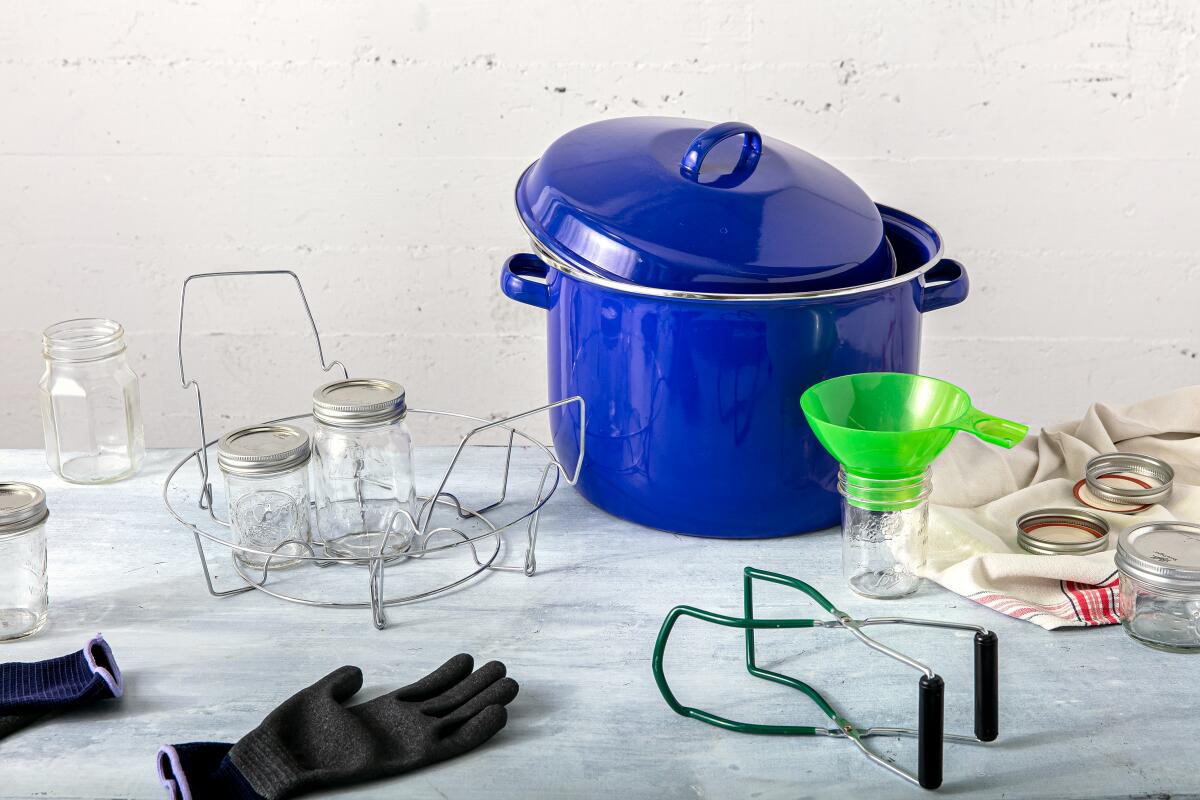
While canning isn’t any more complicated or intimidating than making the jam and takes a lot less time, the only reason I dissuade you from doing it is because it requires more equipment than you have at home. Canning your jam also feels project-y (i.e., less exciting and more prescriptive than cooking it) and isn’t completely necessary; hence why I advise you simply store your jam in an airtight container in the refrigerator. But if you’re committed to go all the way with this process, I’m going to explain what I do to make my jams shelf-stable.
Once I put the pot full of macerated fruit on the stove and bring it to a boil, I start washing the jars I’ll pack the jam in. I use half-pint glass jars made by Ball, but you can use any jars you like as long as they’re approved for canning. Use brand-new jars each time so there’s no worry about anything from an old jar — dents, scrapes or leftover dried-on particles — disrupting the seal and cleanliness. I don’t have a dishwasher, so I use the hottest tap water I have and some soap. I wash the jars, lids and bands thoroughly and set them on a paper towel on the counter near my stove. I also wash the jar funnel and ladle I’ll use to get the jam in the jars.
Once washed, I let everything air-dry while the jam finishes cooking. (If it’s not dry by the time I need it, I wipe the excess water away with a clean paper towel.) Once the jam is done, I turn off the heat under the pot and put on my heat-proof gloves to hold the jars while I fill them with jam. (You can use a kitchen towel but, trust me, this is much easier and safer.) I place the funnel in one jar and use the ladle to pour the jam into the jar while the jam is still very hot.
Once the jam is filled to the top of the jar, I remove the funnel and the level of the jam drops about 1/8 to 1/4 inch below the top. This is exactly what you want. I then place the lid on the jar and screw the band on, using only my fingertips so that it’s not too tight. This is called a “finger-tight” seal and allows the lid to be secured while being loose enough to allow air to leave the jar while it’s being canned. When the jars cool, this creates an air-tight seal. Repeat filling and closing the rest of your jars in the same manner.
As soon as the jars are filled and closed, remove the rack from a canning pot, fill it three-quarters of the way with water and bring to a boil over high heat. Position all the jars in the rack so they remain upright and lower the rack and jars into the boiling water. Once the water returns to a boil, set a timer for 10 minutes and let the jars boil, or “process,” until the timer rings.
Remove the pot from the heat and carefully remove the rack from the water (it will come with handles, which makes this part easy). Using those heat-proof gloves, transfer the hot jars to a paper towel or kitchen towel and let them stand until they cool to room temperature. You’ll know the jars are sealed correctly when the “button” on top of the lid is no longer sticking up. Sometimes it makes a pleasing (or frightening) popping noise as this happens, but not always; check the lid to make sure.
Now you have fully shelf-stable jam that will last for at least a year, but I doubt it will last that long in your house or anyone else’s who loves eating jam.
More to Read
Eat your way across L.A.
Get our weekly Tasting Notes newsletter for reviews, news and more.
You may occasionally receive promotional content from the Los Angeles Times.


